
Hey there, lovely readers! As Valentine's Day is just around the corner, I'm excited to share a heartfelt and personalized gift idea with you all – a Customized Sublimation Coaster. This DIY project allows you to create a unique and memorable keepsake that your loved one will cherish. Join me as I guide you through the simple steps of designing and crafting this special Valentine's Day gift.

THE DESIGN PROCESS
To kick things off, I chose to use Canva, a user-friendly design platform, to create a 4.1x4.1-inch canvas. The canvas size is perfect for a coaster, providing enough space for a meaningful design.
Upload Your Photo:
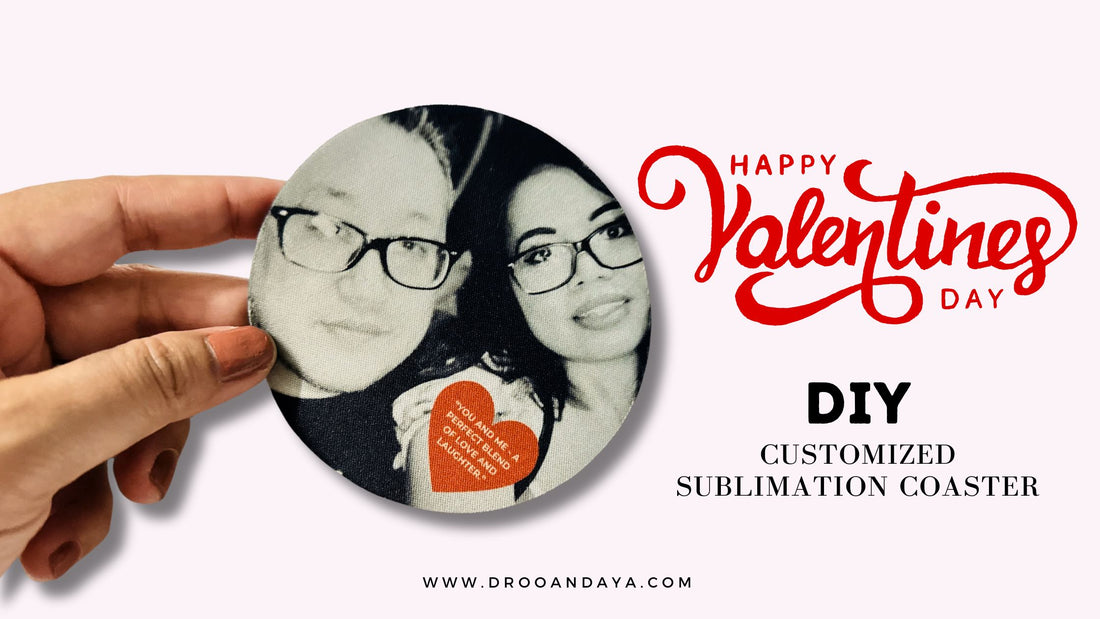
I began by uploading a favorite photo of me and my husband to Canva. This step sets the foundation for the personalized touch that makes this gift extra special.
Applying a Black and White Filter:
For those who prefer a classic black and white look, here's how to achieve this effect using Canva. After uploading your colored photo, navigate to the "EDIT" section, select "FILTERS," and choose the "NOIR" option for a timeless monochrome finish.

Add Heart Shape and Message:
Enhance the design by incorporating a heart shape. In Canva, simply search for "HEART SHAPE" under the elements tab and position it over your photo. To make it even more personal, add a romantic quote or a heartfelt message inside the heart shape. Consider including both your names for an extra touch of sweetness.

If you wish to use the font I used in this project, I utilized the "Montserrat" font.

Don't Forget to Flip:
Before finalizing the design, it's crucial to flip the image. This ensures that when transferred onto the coaster, the design appears correctly.


THE CRAFTING PROCESS
Now that we have our beautiful design, let's move on to the crafting process.
As an Amazon associate, we may receive a commission for qualifying purchases made through the links provided below.
Materials Needed:
- Blank Round Sublimation Coaster
- Epson ET-2803 (converted to sublimation)
- Hiipoo Sublimation Paper 8.5x11
- Heat Resistant Transfer Tape
- Heat Resistant Transfer Tape Dispenser (optional)
- Butcher Paper
- Heat Resistant Gloves
Steps:
1.) Print the Image:
Using a converted sublimation printer and Hippo Sublimation Paper, print the designed image.
2.) Prepare the Coaster:
Place the blank sublimation coaster on top of the printed image. Secure it in place using heat transfer tape.

3.) Flip and Press:
Flip the coaster so that the printed side faces down. Carefully position it on a heat press. Cover the coaster with butcher paper and press it at 365 degrees for 70 seconds. This step ensures that the design transfers seamlessly onto the coaster.

Voila! You've just crafted a one-of-a-kind Customized Sublimation Coaster, ready to surprise your special someone this Valentine's Day. This thoughtful and personalized gift is sure to bring joy and warmth to your loved one's heart.

Happy crafting!