

Greetings, fellow DIY enthusiasts! Today, I have an exciting project to share with you—an amazing faux leather monogram keychain that you can easily create on your own. Get ready to unleash your creativity and let's dive into the step-by-step process!

For this particular project, we'll be utilizing the powerful Silhouette Studio Software, which offers a myriad of design options and possibilities.

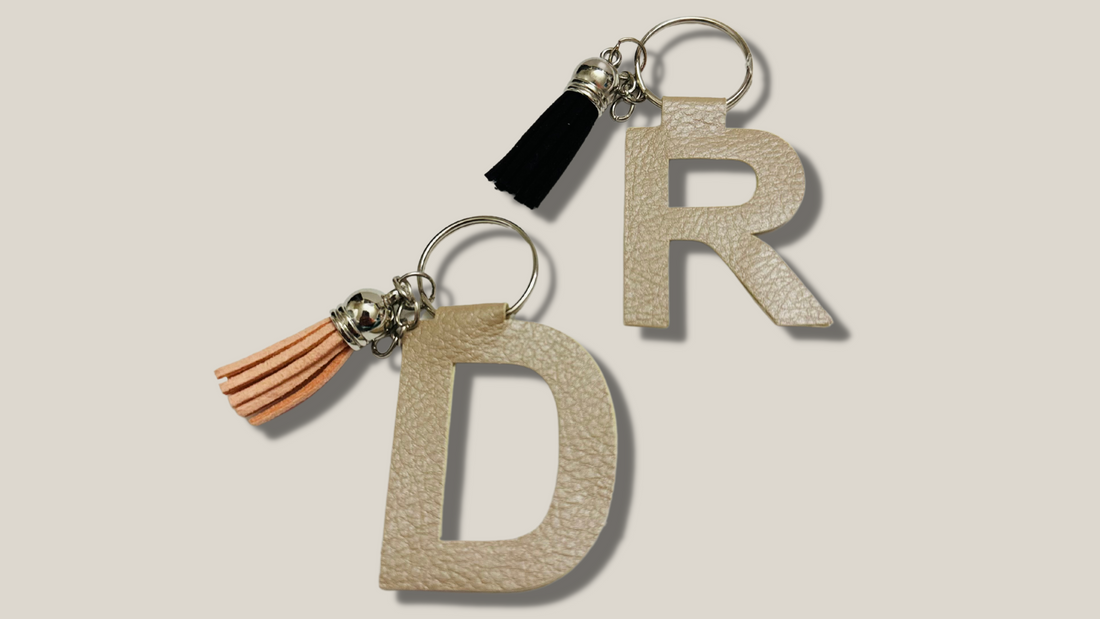
The first step is to choose the letter you want to feature on your keychain. In our case, we'll go with the stylish letter "R." To add some flair, we'll be using the Arial font and making it bold, ensuring that our monogram stands out.
Once you've selected your letter, it's time to resize it according to your preferences. You have complete control over the size, so feel free to experiment and find the perfect dimensions for your keychain. To enhance the visual impact, we recommend duplicating the letter, creating a symmetrical design.
To duplicate the letter in Silhouette Studio; you can either Copy (CTRL C) and Paste (CTRL P) or CTRL D to automatically duplicate the letter.

For this particular letter, don't forget to flip the duplicated letter vertically. To flip something vertically in Silhouette Studio, select the duplicated portion and go to Object > Mirror > Flip Vertically.

Now we create a small rectangle shape, which will be strategically placed between the two R's. This will serve as a visual separator, giving your keychain an elegant and well-balanced look.

Now comes the magic of Silhouette Studio Software! Select both letters and navigate to the "Object" menu. From there, click on "Modify" and choose the "Weld" option.


This brilliant feature merges the two R's together seamlessly, eliminating any cutlines that might disrupt the overall design. The result? A beautifully unified monogram that exudes craftsmanship and attention to detail.

To bring our design to life, we'll be utilizing the versatile Cameo Silhouette cutting machine. Ensure you've configured the appropriate settings, opting for the leatherette option to achieve the desired cutting precision. Once everything is set, send your design to the cutting machine and watch the magic unfold.

As with any project, a pro tip can make all the difference. If, for any reason, the material doesn't cut all the way through, don't panic! Instead, keep the material in the cutting machine and give it another pass or two. The number of passes required may vary based on the type of cutting machine and the sharpness of the blade you're using. Patience is key here, so take your time to achieve that flawless cut.


For this specific project, we'll be using the ever-popular Cricut faux leather. Although it tends to be on the thinner side, it's perfectly suitable for practice sessions or delightful gifts for your beloved family and friends. However, if you plan to venture into selling your handmade creations, we recommend exploring thicker and more premium faux leather options for a truly professional finish.

Now that our pieces are cut, it's time to assemble our monogram keychain. Grab your trusty hot glue gun and apply a small amount of glue to securely bond the letters together. Be mindful of the alignment to ensure a neat and polished result. To complete the keychain, attach a shiny silver key ring, which not only adds functionality but also a touch of elegance.

And there you have it—the grand reveal! Behold your marvelous faux leather monogram keychain, a testament to your creativity and craftsmanship. Take a moment to admire your handiwork, knowing that you've crafted a unique and personalized accessory that will undoubtedly turn heads.
I hope this step-by-step guide has inspired you to embark on your own monogram keychain adventure. Let your imagination run wild, experiment with different fonts and designs, and make each keychain truly your own. Remember, the possibilities are endless, and the joy of crafting is in the journey itself.
Thank you for joining me today, and I genuinely hope you enjoyed this detailed tutorial. Stay tuned for more captivating DIY projects, and may your crafting endeavors always be filled with satisfaction and happiness. Until next time, happy crafting!
As part of the Affiliate Program, we may earn from qualifying purchases made through the links below
MATERIALS ON THIS TUTORIAL